Showing posts with label portrait. Show all posts

Friday, June 22, 2018

Reworking A Portrait (And a Bit of News)


First, For A Bit Of News:

After a few decades of listening to husband John talk about the virtues of Colorado and missing our sons who live there, I have finally given in.  We have bought some property in Boulder, and will be in the process of selling our Barrington home, knocking down the house on the new property, and building a new one.  I'm girding myself for the roller coaster that is to become my new life. 

This is truly a bittersweet move.  I will miss the life we have built here, and the wonderful friends that we've made.  My consolation is that we will stay in touch and visits will be made.  But first we have to build that house!

I hope that you'll stay with me and my blog.  I'll let you know how the move is going, and how I find my footing as an artist in a new community.  If I haven't said it lately, your support has meant the world to me.  Just knowing that people are reading what I have to say has been wonderful.  Thank you, and let's go on a new journey together!


And Now For Our Regular Program:


Cassidy, 9x12"

When I paint a portrait from life, I have limited time with the model.  In two to three hours, I try to capture the essence of the person, and having a set amount of time forces me to focus quickly on the story I want to tell.  More times than not, I'll never touch these studies again because I want the painting to remain a study.  And let's face it, I usually overwork things if I go back in with lots of time on my side.

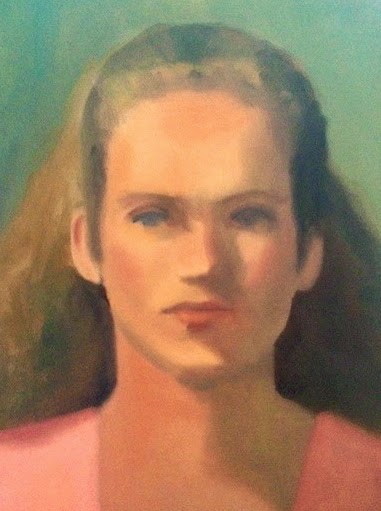
This little painting is an exception.  The version above is the reworked version.  Here is the original after about 3 hours with the model.  See if you can tell what I reworked, and I'll explain what I did below.


The first thing that bothered me with my study was that she appeared to be scowling!  Nobody wants an angry painting.  I gave her a slight brow lift and turned up the corners of her mouth ever so slightly.  I zapped up the color on her mouth and gave her a fuller lower lip.  Better already.

Then I looked at color temperature.  The shadow under her chin was actually very warm, sort of a dark reddish brown.  If the shadow is that warm, the light areas of her face will be cooler, and I had painted them quite warm initially.  I glazed a layer of light blue over the warm yellowish areas to cool them down, and added light blue highlights.  

I looked at the transition between the shadowy area on her cheek and the light area and decided to add a flush of light red to the transition area.  Cheek color made her come alive.

And then I put my brushes down!  If I kept working, all the spontaneity would be lost.  I think this painting says what I wanted it to, and I'll call it quits now.

Friday, November 3, 2017

A Palette Knife Portrait

Oil on Gessoboard, 11x14"

Last Friday, I taught a class on portraiture, and I gave a demonstration on how to set up and draw the foundation of a portrait.  After the drawing was in and the shadow areas were mapped out, I wanted to show the class that finishing the portrait can be very interpretive and fun.  As long as we follow the drawing and shadow/light areas that have already been established, anything goes-- even paint applied thickly with a palette knife!

Tuesday, December 13, 2016

A New Article

"Mallory", 16x20"
Painted in Carolyn Anderson's workshop

My article for the Oil Painters of America has just been published, titled "A Workshop With Carolyn Anderson: A Personal Discovery".  If you'd like to read the article, click on Ann Feldman OPA.

No matter where I am with my art at any given point, I always find a workshop taught by someone I admire to be invaluable.  Just being able to delve in and concentrate on my goals for several days on end always results in new discoveries and maybe even a jump forward in my growth as an artist.


Tuesday, July 5, 2016

"Jack As A Young Man", 12x16"

 "Jack As A Young Man"


"Claire"

In addition to painting en plein air once a week this summer, I am painting from models in Bill Schneider's studio.  I'm considering this time as sort of a mini-camp, to sharpen my observational skills and broaden my horizons.  Everyone in our little group has something to contribute, from a new outdoor vista to try, to introducing a new model to our group.  

Jack is the son of a friend of mine, and when I met him for the first time I thought that I would love to paint him.  He is that wonderful age somewhere between boyhood and manhood, and we all loved the challenge of trying to capture that moment.  Claire is a Barrista at Starbucks, and her coloring and translucent skin were lovely to paint. I told myself not to fuss with her portrait too much, leaving it loose and impressionistic.


Sunday, May 22, 2016

"Michelle", 11x14" oil on gesso board


This painting of Michelle was done from life last week, and I painted it in Bill Schneider's studio in Crystal Lake.  The lighting there was different for me, so I found myself with a final product with colors that look different from most of my work.  I was intrigued by the way that the muted palette made the portrait appear kind of old fashioned, and maybe even a bit timeless.

For information on purchasing this portrait, please click on Ann Feldman, Michelle.

Tuesday, June 9, 2015

"The Faces of Barrington"


"Grace", 12x16"

Since September, the Barrington Cultural Arts Center has been meeting on a weekly basis, asking residents of Barrington to sit for a portrait.  The result of all this effort (and fun) is a wonderful exhibit of this work, numbering nearly 150 portraits!  If you are in the Barrington area this Friday, I would love to see you at the opening of this show at the Ice House Mall from 6:00 to 9:00pm.  Many of the models and artists will attend, and food and drink will be supplied by Barrington businesses.

I will have four portraits on display.  It would be so wonderful to see you there!


Tuesday, May 19, 2015

"Resilience", 16x20"


It's been quite some time since I've posted to my blog-- I miss being in touch with you!  For the last month or so, I've been traveling to see friends and family from coast to coast and trying to see as much art as possible at the same time.  I visited the Metropolitan Museum of Art and the Chelsea gallery district in NYC, the Boston Museum of Fine Arts, and finished up with the wonderful "Boticelli to Braque, Masterpieces from the Scottish Museum" at the De Young Museum in San Francisco.  All this art can be inspiring, and it can also be intimidating!

It's actually kind of tough coming back home and facing the blank canvas after seeing so many master works.  After a few deep breaths, I tell myself that even the masters had several "clunkers" along the way-- not every single piece they created ended up in a museum.  Any time I flip through a book of an artist's works, I end up loving a few, and feeling rather lukewarm about many others.  And that's OK!  If I am to explore new expressions, I have to be comfortable with the clunkers that might result as part of the process.

"Resilience" was painted quickly during this intense period of travel and observation.  I decided to leave her rather unfinished.  I thought that if I finished off every bit of the painting, it would loose some of its spontaneity, and I enjoy seeing my thought process under the paint from time to time.

This painting is for sale at the Button Petter Gallery in Saugatuck, Michigan.  Click here for more information.

Wednesday, April 29, 2015

"Selena", 16x20"


Earlier this month, I had the great fortune of taking a workshop with Daniel Gehartz.  To say that there were a few "Aha Moments" during my time with him would be an understatement!  I especially came away with new understandings about turning form using temperature control and making my portraits more powerful through edge variation and value separation.  I know that's a lot to take in, so I will elaborate on these concepts more in future posts.

Selena came to model for us on the first day.  I experimented quite a bit with "warm and cool" temperatures in this piece.  Notice the warm red tones in the shadow side of her face.  That was new for me.  Dan encouraged us to really squint and see that these tones were actually happening, so it's OK to go ahead and put them in.  

I guess all this squinting and experimenting paid off.  Selena's grandma purchased the painting!


Friday, March 20, 2015

"The Rancher", 12x16" And A Lesson From Carolyn Anderson

"The Rancher", Ann Feldman

Last year, I took a workshop with Carolyn Anderson, a phenomenal impressionist painter.  I've admired her loose, interpretive style of painting for years, so I was thrilled to be able to see how she approaches a painting.  One of the things I came away with was that sometimes a small brush can be used to add some "air" and mystery to a painting.  Seems counterintuitive, since we are often told to reach for the largest brush possible when we try to loosen up our paintings.  

In "The Rancher", I used a #2 filbert brush (which is pretty darned tiny) for the entire painting, using the point to draw and fill in with scratchy strokes, then I used the side of the brush to flatten out the paint in areas such as the hat.  I call this style of painting "Drawing with Paint".  In Carolyn's workshop, once I started with this style, I couldn't stop!  She would come by my easel and encourage me to pick up one of my other brushes to finish the painting, but I wanted to see how far I could go with one brush.  A little is good, so a lot will be great, I thought…

Here is an example of Carolyn's work.  You can see why I have been so taken with her!

"Girl With Curls", Carolyn Anderson


Monday, March 16, 2015

"Vesna's Daughter", 12x16", And Some thoughts from Qiang Huang


"Vesna's Daughter"

I read in Qiang Huang's excellent blog that he believes that artists tend to group into two categories: still life/portrait painters and landscape painters.  The still life/portrait folks enjoy painting the forms of things, while landscape painters look for the patterns in their surroundings.  When I read this, it was as if a gong sounded in my head-- I'm a form painter, and always have been!

I started to think about other artists through history, and they did tend to settle in one or the other of these two categories.  Qiang went on to say that after an artist has mastered one type of painting, he or she often starts to look for challenge in the other genre.

I love a beautiful landscape as much as the next person, but have had a dickens of a time painting my own.  It's good to know that there is a challenge out there on the horizon, waiting for me to put my toe into new waters.  But maybe not today.  Tomorrow's not looking good either!

Still Life by Qiang Huang

Tuesday, March 10, 2015

"Resolve", 12x16" And Inspiration from Robert Henri


Last week I taught a workshop at the Northlight Studio in Arlington Heights on painting the portrait with palette knives.  "Resolve" is the painting that I started as a demonstration and finished in the studio.  Portraits have a way of getting very detailed, and the character of the model can start to drain away as we strive for the perfect likeness.  A palette knife in hand will not allow this to happen.  Color and shape have to be laid in boldly.  The final product can be more a piece of art than just a likeness of the model.

An artist must first of all respond to his subject, he must be filled with emotion toward that subject and then he must make his technique so sincere, so translucent that it may be forgotten, the value of the subject shining through it.” 
― Robert Henri, The Art Spirit

Robert Henri (1865-1929) was an American artist and teacher who was extremely prominent in the Ashcan School of American Realism.  His book, "The Art Spirit" is always close at hand in my studio.  I can open that book on any page and find new inspiration to create art, no matter how flat or lost I'm feeling that day.  Here is an example of Henri's work.  It is evident that he is striving to portray the character of his model much more than concentrating solely on a likeness. This painting captures a feeling I think we all can respond to.


"Dutch Girl Laughing" Robert Henri

Wednesday, February 25, 2015

"Deepa/Palette Knife Portrait", 12x16" And Some Upcoming Events


A few weeks ago, I painted Deepa using only one color (Burnt Sienna).  I brought this painting home and decided to add color to it using a palette knife.  Using the underpainting as my guide, I covered the painting again in thick color.  The process was made easier since my values (darks and lights) and my drawing were already worked out.  It was a bit like putting pieces of a puzzle together, and it was actually pretty fun!


I'll be teaching this method at the Northlight Studio in Arlington Heights IL this coming March 6th.  In other news, I'll be giving a demonstration on Painting Impressionistically for the North Area Arts League on March 3rd at the Woodstock Opera House at 7pm.  Admission is free!  I hope you can be there.

Tuesday, February 17, 2015

"The Character Portrait", A Lesson From David Hockney

"Focus"Ann Feldman


A friend asked me the other day if I ever find a model session uninspiring or difficult to paint because the model is not what you'd call a "classic beauty".  My short answer is no.  For the longer answer, here's why.

A few years ago, I took an afternoon in Los Angeles to see David Hockney's portrait exhibit at the Los Angeles Contemporary Museum of Art.  At first glance, these huge paintings appeared strong and somewhat characateurish, but as I spent time there, they became so much more.

"Mumby", David Hockney


I could feel the relationship between the sitter and Hockney, and I imagined what it must have been like in that room the day the model sat for him.  Faces were not made beautifully, but I felt that it was the personality he was after, much more than the likeness of the face.

I made a mental note that day that sometimes the most beautiful portraits are much more than "skin deep".  There are indeed many beautiful portraits of beautiful people out there, but a portrait of a beautiful unique character can be much more difficult to achieve, and it may say much more about the model than a simple likeness.

Ever since my time with Hockney's portraits, I approach model sittings differently.  I take a few minutes to observe the model in silence.  I consciously take a few deep breaths and I wait for something about this unique person to introduce itself to me.  I want my portraits to communicate how I felt about the model that day, beyond an accurate likeness.

 "Friendly and Open"
Ann Feldman


Thursday, February 12, 2015

"Deepa, Monochromatic Study", 16x20"


When I only have a few hours with a model, I will sometimes limit my color choices so I can concentrate on getting my drawing and values (darkness vs light) correct.  Yesterday, I used only Burnt Sienna to make a map of Deepa's face and shoulders.  I used a rag to lift out the lighter areas, so there was no need to even add white.  I may decide to let it dry and go back in with color, or I may leave well enough alone and be content with a nice study of a beautiful model.

I will be teaching this technique at my upcoming one day workshop at Northlight Studio in Arlington Heights on March 6th.  If you would be interested in attending, please drop me a line.

Wednesday, December 3, 2014

"Lucille, A Reworked Portrait", 16x20"


Old things CAN be new again, sometimes.  I took this old painting that had been hanging around since about 2007 and threw some new paint at it.  As long as I stayed in the correct value range (light to dark), I could add any colors that I wanted into all areas of the painting.  Here is a closeup of the area on her cheek and neck:


I was able to add notes of purple, green, blue, and orange into this area of the model.  Since each of these colors was the correct value, none of them stood out and away from the others.  Sticking with the correct value actually frees us to experiment with color!

Wednesday, September 10, 2014

Painting Knife Workshop


I was getting ready to teach a Painting Knife workshop this weekend, and stumbled upon a couple of Oldies But Goodies that I thought I'd pull out of the archives.  Both were painted thinly at first, using a brush, then I got out the trusty knife and laid down thick paint over everything I could.  They are still among my all time favorites.

And now for a little news-- I've started to teach art in the continuing education department at Harper College in Palatine, Illinois.  So far, so good!  Still teaching at Mainstreet, too.

If you get Southwest Art magazine, you'll see an ad with some of my paintings there this month.  It was part of their American Impressionist Society feature.

Lots of teaching, not much posting!  I hope to get back to the easel very soon!


Monday, July 7, 2014

A Couple of Portraits, 9x12 each


I've been asked many times if I have tried to translate my loose style into portraiture. Until recently, I haven't dared to, since I was afraid that when I loosened things up, I'd lose the likeness of my sitter.  I watched two of the best in person-- Jeff Watts and Carolyn Anderson as they painted portraits from life that were loose and interpretive.  "Nice for them", I thought.  But I'll never be able to do that!

Then I tried something completely new.  I painted these two portraits using only a very small round brush (#1, can you believe it?).  I scratched the poor thing down to the nub, but I learned that I can use paint in much the same way I can use a drawing medium, such as charcoal or pastel.  If I started to get tight, I'd use the brush to scratch away at the hard edges.   
As for the likeness, I found that as long as I have the eyes, nose and mouth in the right place, I could be pretty interpretive with the rest of the painting.  It's a baby step, but it was fun, and I'm ready to do some more!


Wednesday, May 21, 2014

"Paulette", 12x16" Painting with Three Colors


Last week, I taught a two day workshop in Huntley, Illinois on Color.  We worked with a limited palette of red, yellow, and blue to really learn the properties of the colors and how to mix them effectively.  On the evening between the two classes, I went to open studio to paint.  All I had on my palette were my three colors, so I decided to put my theory to the test and paint only with what I had.  This portrait is the result.

Paulette is a student of mine who has just graduated from high school.  We will miss her so much when she leaves to go to college.  An accomplished artist who will go on to do fabulous things with her life.

Below, you can see the color wheel that we mixed in class.  (My students were MUCH neater than I was).  Three colors can go a long way, and can eliminate a lot of confusion along the way.  Once we have a really good understanding of the primary properties, we can go on to add other colors to our palette.


Thursday, March 13, 2014

"Just A Thought" 9x12", And a Lesson in Painting the Eye


Terry stopped in to pose for our Open Studio session last night.  Since I had been painting all that day, I was warmed up and ready to go.  I put down thick paint with a bare minimum of detail.  I decided to stop painting as soon as I had a good gesture.  If I noodled it with it any more, I think I would have killed the spontaneity.


In my Monday Evening Portrait class, we have been working on painting features.  Here is my method for painting an eye ( I used a #2 filbert brush for the entire process):

 We will use a photo of Christy for our model.


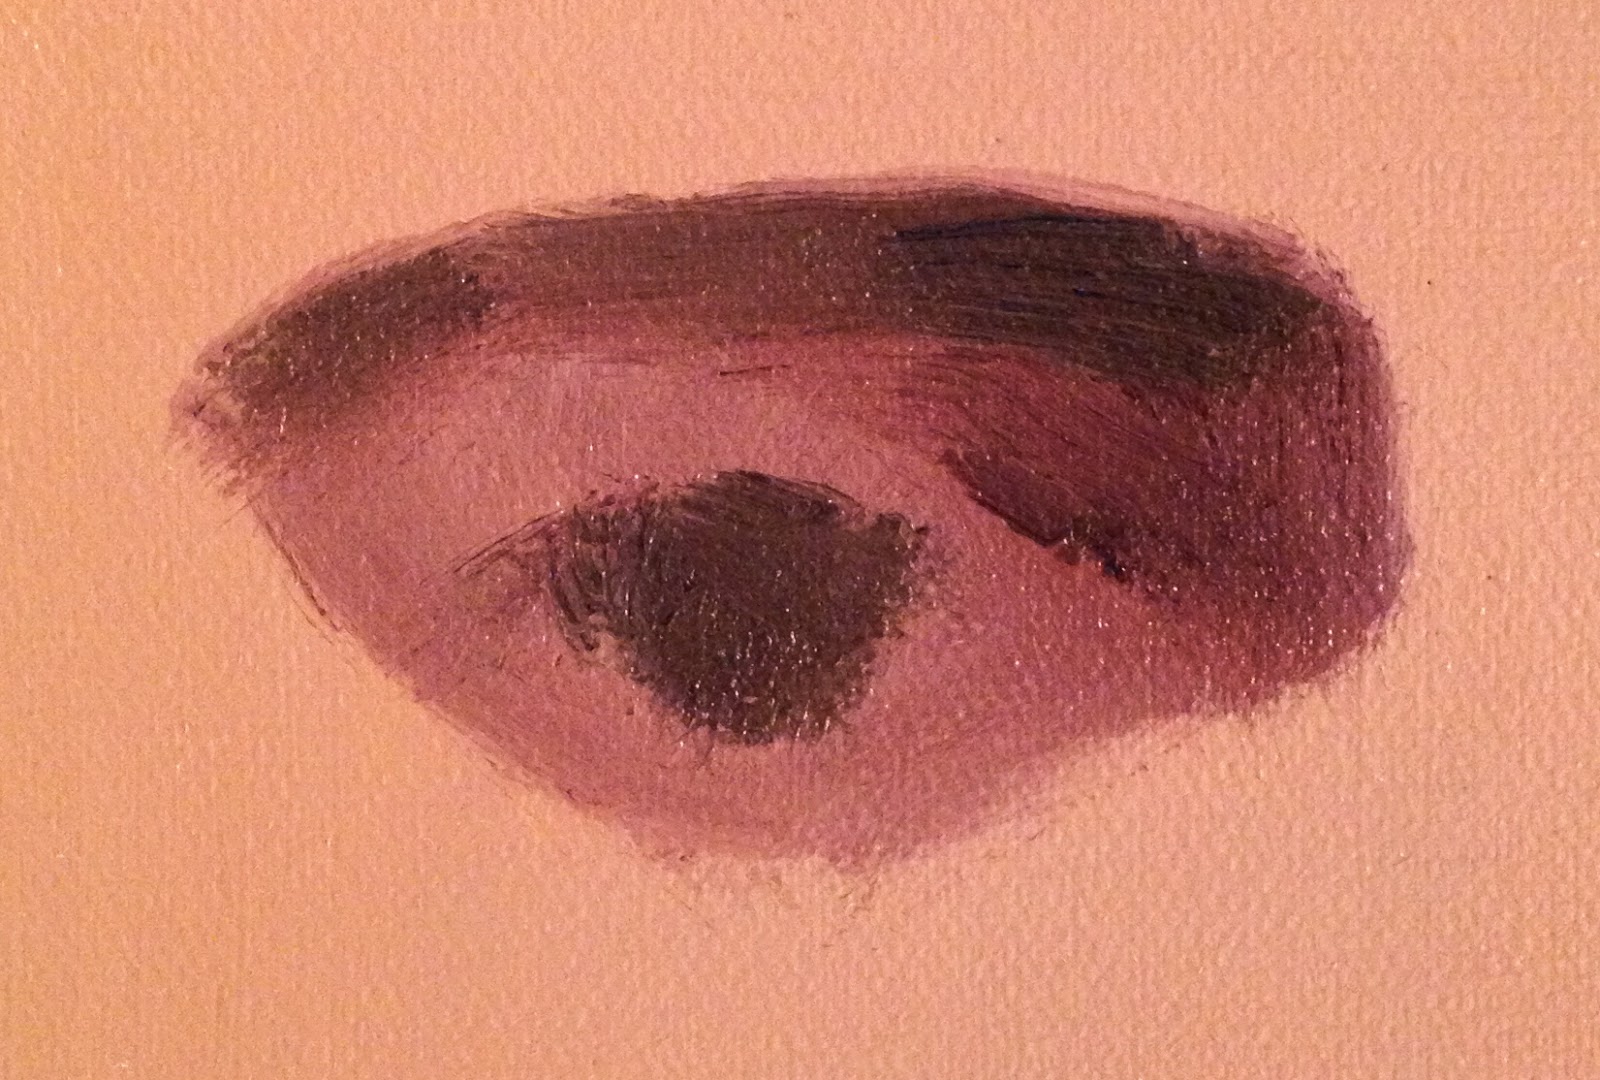
 After putting down a base of light skin tone, I find the entire shadow area of the eye socket.  I put this in with a middle value of purple warmed with a bit of cadmium red.


 On the top of the shadow form, I paint in the brow with a dark mixture of ultramarine blue and burnt sienna.


 Once the brow is in, I can see where the iris belongs.  Using the same mixture as the brow, I loosely paint in the iris.


I add the lash line with the same dark mixture.


 I add the "white" of the eye, which in reality is a very light gray.  I find the lid crease and darken it.


 And now for the fun part-- the details!  I highlighted the lid and the brow bone.  I darkened the shadow underneath the eye to give it more dimension.  Then I added a hint of red in the tear duct and placed a tiny highlight on the eye between the pupil and the colored area of the eye.  I lightened the eye color on the bottom half of the iris.  Voila!

Friday, February 28, 2014

A Portrait in Progress


I thought it might be interesting to show the process behind painting this portrait from life.  The painting on the left shows the stage where I am thinking about putting down lots of color and finding the planes of the face and features.  In the painting on the right, I've taken my trusty Langenickel soft brush and softened everything I did in the first stage, then added a few details like nostrils and highlights to bring it all together.


Here are the colors that I used in the light areas of her face.  I begin by mixing Cadmium Yellow Light, Cadmium Scarlet, and Titanium White for a basic warm skin tone.  Then I added a drop of green, then Cerulean Blue, then Quinacridone Rose, then more Cadmium Yellow to change the color of the skin ever so slightly.


For the shadows on her face and neck, I started with a mixture of Ultramarine Blue with Quinacridone Rose and Titanium White.  To this mixture, I added Cadmium Scarlet, then a medium value green, then Cerulean Blue, and lastly I mixed Yellow Ochre to my basic purple color.  This gave me a nice range of shadow colors to play with.

When I softened her face, I tried to let the colors stay separated just a bit.  I have a tendency to over blend and lose the color excitement.  When I find a good balance, I put my brush down and walk away quickly!